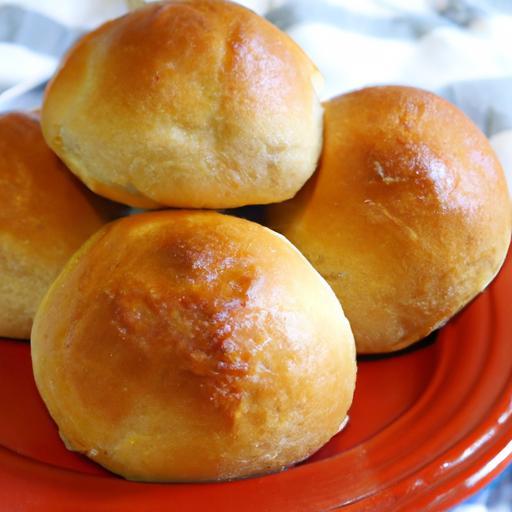
There’s something undeniably comforting about teh warm embrace of freshly baked rolls-those pillowy, soft clouds of bread that make every meal feel like a special occasion. But for those navigating the gluten-free landscape, finding a roll that’s both tender and fluffy can often feel like chasing a culinary unicorn. If you’ve ever sighed over dry,crumbly gluten-free bread or settled for something less than perfect,it’s time to change the narrative. In this article, we’ll unveil an easy homemade recipe for soft and fluffy gluten-free rolls that not only satisfy your cravings but also bring the joy of baking right into your kitchen. Get ready to transform simple ingredients into irresistibly light, gluten-free delights that everyone will love-no compromise, just pure, homemade comfort.
Soft & Fluffy Gluten-Free Rolls: Easy Homemade Recipe transforms the challenge of gluten-free baking into an irresistible experience of pillowy softness and delicate crumb. Achieving this perfection starts with the very foundation-selecting the right blend of gluten-free flours and mastering hydration to create a tender, airy dough that bakes into golden, melt-in-your-mouth rolls.
Prep and Cook Time
- Preparation: 20 minutes
- Rising Time: 1 hour 30 minutes
- Cooking Time: 20 minutes
- Total time: 2 hours 10 minutes
Yield
- 8 medium-sized rolls
Difficulty Level
- Easy to Medium
Ingredients
- 1 cup brown rice flour, finely ground
- 1/2 cup tapioca starch (for elasticity)
- 1/2 cup sorghum flour (for mild sweetness)
- 1 tbsp xanthan gum (to bind and trap air)
- 2 tsp instant yeast
- 1/2 tsp baking powder
- 1 tsp granulated sugar
- 1 tsp fine sea salt
- 3/4 cup warm milk (dairy or plant-based, about 110°F)
- 2 tbsp olive oil or melted butter
- 2 large eggs, room temperature
- 1 tbsp apple cider vinegar (for lightness and shelf life)
The Key to Ultimate Softness: Dough Hydration
Hydration holds the secret to transforming a gluten-free dough from dense and crumbly to a soft and fluffy masterpiece. for these rolls,a slightly wetter dough (a hydration level of approximately 75%) keeps the crumb tender while allowing the yeast to work its magic. combine your flours slowly, incorporating liquids carefully to maintain the perfect balance. Too dry, and the dough will be crumbly; too wet, and it won’t hold shape. Aim for a sticky but manageable dough that feels almost like a soft cookie batter before resting.
Step-by-Step Techniques to Achieve Light and Airy Texture
- Mix dry ingredients thoroughly in a large bowl to ensure even yeast distribution and consistent baking powder activation.
- Whisk together warm milk, olive oil, eggs, and apple cider vinegar; the vinegar improves acidity, enhancing both texture and shelf life by slowing spoilage.
- Gradually incorporate wet ingredients into dry flours; beat or mix on medium speed using a stand mixer fitted with a paddle attachment until smooth and sticky.
- Let the dough rest and rise in a warm, draft-free spot until doubled in volume, roughly 1 to 1.5 hours-this fermentation allows gas bubbles to form responsible for an airy crumb.
- Divide the dough into equal portions and place in a buttered or parchment-lined baking pan,spacing them slightly to encourage even expansion.
- Allow a secondary proofing for 30 minutes until the rolls nearly double again, ensuring maximum softness.
- Bake rolls in a preheated oven at 375°F (190°C) for 18-22 minutes, turning golden brown with a delicate crust that softly yields beneath your fingers.
Tips for Enhancing Flavor and Shelf Life Without Gluten
- Incorporate vinegar or lemon juice: The slight acidity not only contributes subtle tanginess but also prolongs freshness by preventing mold.
- Use freshly ground flours: Brown rice and sorghum flours deliver nuttier flavors when freshly milled, intensifying the complexity of your rolls.
- Add a tablespoon of honey or maple syrup: A subtle sweetness highlights the natural cereal flavors and helps maintain moisture.
- Brush rolls with melted butter or olive oil post-baking: This locks in moisture, lends shine, and deepens aroma.
- Store rolls in airtight containers with a slice of apple or a folded paper towel: These simple hacks control humidity, keeping rolls soft for days.
Instructions
- combine dry ingredients: In a large bowl,sift together brown rice flour,tapioca starch,sorghum flour,xanthan gum,yeast,baking powder,sugar,and salt. Whisk until evenly blended.
- Prepare wet mix: In a separate bowl, whisk warm milk, olive oil, eggs, and apple cider vinegar until homogeneous.
- Create dough: Pour wet mixture into dry ingredients slowly, mixing with a stand mixer or hand mixer on medium speed until sticky, smooth dough forms.
- First rise: Cover bowl with plastic wrap or a damp kitchen towel. Place in a warm, draft-free area for about 1 to 1.5 hours, until doubled in volume.
- Shape rolls: Gently deflate dough.Divide it into 8 equal portions using a wet spoon or spatula to handle stickiness. Place rolls into a greased 9×13-inch baking pan.
- Second rise: Cover loosely and allow rolls to proof for 30 minutes to achieve puffiness.
- Bake: Preheat oven to 375°F (190°C). Bake rolls for 18-22 minutes or until tops turn golden brown and springs back slightly when touched.
- Finish and cool: Remove from oven, promptly brush tops with melted butter or olive oil for added moisture and shine. Cool slightly before serving.
Chef’s Notes: tips for Success
- Substitution tip: If sorghum flour is unavailable,substitute with millet flour for similar texture and moisture retention.
- Egg-free option: Replace eggs with 1/4 cup unsweetened applesauce combined with 1 tsp baking soda, adjusting liquid accordingly.
- Sticky dough handling: Always wet your hands or spatula when shaping rolls to prevent sticking without adding excess flour.
- Freezing instructions: After baking and cooling, freeze rolls in an airtight bag. Reheat gently wrapped in foil at 300°F (150°C) for 10 minutes to restore softness.
Serving Suggestions
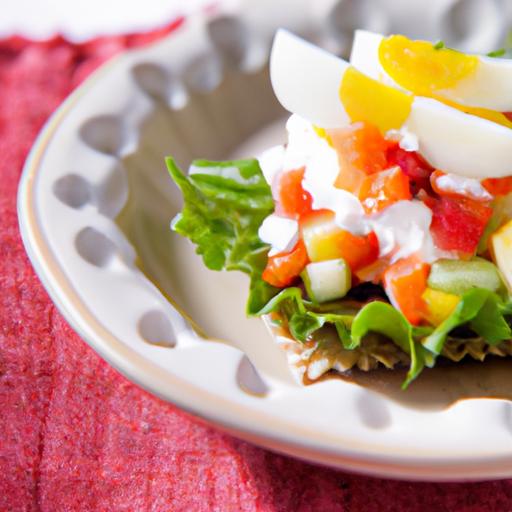
Serve these soft & fluffy gluten-free rolls fresh and warm, slathered with softened butter or your favorite herb-infused olive oil. For a gourmet touch, try topping with a sprinkling of flaky sea salt and freshly cracked black pepper or a smear of homemade garlic-herb butter. They pair beautifully with hearty soups, roasted poultry, or as a base for creative sliders.

Nutritional Data
| Nutrient | Per Roll (approx.) | % Daily Value* |
|---|---|---|
| Calories | 140 | 7% |
| Protein | 3g | 6% |
| Carbohydrates | 25g | 8% |
| Fat | 3.5g | 5% |
| Fiber | 1.5g | 6% |
For more expert gluten-free bread recipes and tips, explore our Gluten-Free Bread Collection. for deeper insights into gluten-free flour blends, visit Gluten-Free Living’s Flour guide.
Q&A
Q&A: Soft & Fluffy Gluten-Free Rolls – Easy Homemade Recipe
Q1: Why are gluten-free rolls often denser than regular rolls?
A1: Gluten acts like a stretchy web that traps air bubbles, giving customary bread its chewy texture and rise. Without gluten, rolls can turn out dense or crumbly. But with the right combination of gluten-free flours and binding agents like xanthan gum or psyllium husk, plus careful kneading and proofing, you can achieve soft, fluffy rolls that rival their wheat-filled cousins.
Q2: what makes these gluten-free rolls “soft and fluffy”?
A2: It’s all about balance. A blend of gluten-free flours such as rice flour, tapioca starch, and potato starch creates a tender crumb. Adding moisture-rich ingredients like yogurt or applesauce keeps the rolls from drying out. And yeast fermentation builds lightness and flavor. The result: pillowy, melt-in-your-mouth rolls perfect for any occasion.
Q3: Can I make these rolls ahead of time?
A3: Absolutely! You can prepare the dough, let it proof, shape the rolls, and then freeze them before the final rise. when your ready, thaw, let them rise again, and bake fresh. Alternatively, bake them fully, cool, and freeze. Just reheat gently in the oven to restore that freshly-baked softness.
Q4: Are these rolls suitable for people with other dietary restrictions?
A4: This recipe is naturally gluten-free, but you can easily adapt it. Use dairy-free yogurt or milk alternatives to make it vegan-friendly, and swap out eggs with flax or chia egg substitutes if needed. Just be sure to check all ingredients for cross-contamination if you have severe allergies.
Q5: What’s the secret to a perfectly golden crust on gluten-free rolls?
A5: Brushing the rolls with melted butter or olive oil before baking creates that gorgeous, glossy crust. For an extra touch, a light egg wash adds shine and a golden hue. Keep an eye during baking, as gluten-free breads sometimes brown faster.
Q6: Can I use a bread machine for this recipe?
A6: yes! Many bread machines have gluten-free settings. Just add ingredients in the order recommended by your machine and select the gluten-free cycle. Though,shaping the rolls by hand after the first rise frequently enough yields the best fluffy texture and shape.
Q7: How do I store leftover gluten-free rolls?
A7: Store them in an airtight container at room temperature for up to 2 days.For longer storage, freeze them individually wrapped. Reheat gently in the oven or toaster oven to revive their softness and warmth.
Q8: What dishes pair best with these soft and fluffy gluten-free rolls?
A8: They’re incredibly versatile! Serve them alongside hearty soups, use them as sandwich buns, or enjoy them with butter and honey for breakfast.their tender texture complements everything from grilled veggies to rich stews.
Ready to bake the fluffiest gluten-free rolls you’ve ever tasted? With this easy recipe, you’ll never miss gluten again!
To Conclude
Whether you’re new to gluten-free baking or a seasoned pro, these soft and fluffy gluten-free rolls prove that flavorful, homemade bread doesn’t have to be complicated or compromise on texture. With simple ingredients and an easy-to-follow method, you can bring the comforting aroma and irresistible softness of freshly baked rolls right to your kitchen. Perfect for family dinners, holiday feasts, or a weekend treat, these rolls celebrate the joy of baking without gluten – turning ordinary meals into something truly special. So go ahead, roll up your sleeves, and enjoy the satisfying experience of creating bread that everyone can savor, bite after delightful bite.