There’s something undeniably magical about biting into a perfectly baked pie crust-the delicate crunch, the buttery layers that melt effortlessly on your tongue, and that inviting aroma that fills the kitchen. but what if you or someone you love can’t enjoy traditional pies as of gluten sensitivities or dietary restrictions? Enter the world of gluten-free pie crusts, where mastering the art means balancing texture and flavor in ways both surprising and delightful. In this article, we’ll uncover the secrets too crafting flaky, flavorful gluten-free pie crusts that don’t just mimic their wheat-based counterparts but stand proudly on their own, turning every slice into a festivity of creativity and taste. Whether you’re a seasoned baker or a curious newcomer, get ready to transform your approach to gluten-free baking-because every great pie starts with a crust worth savoring.
Flaky & Flavorful: Mastering Gluten-Free Pie Crusts
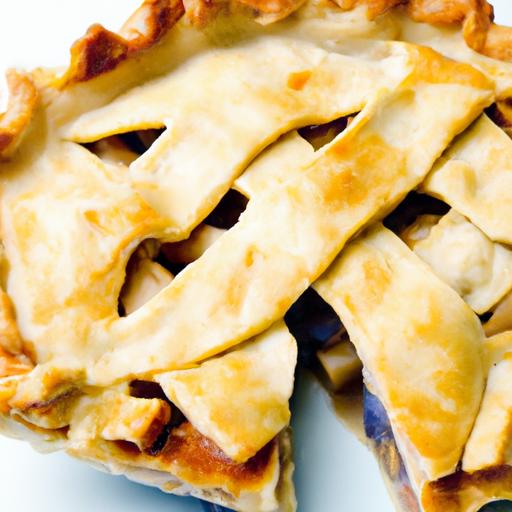
Flaky & flavorful gluten-free pie crusts capture the essence of traditional baking while embracing the unique textures and tastes that gluten-free flours offer. My journey to perfect this crust began with countless trial-and-error attempts, searching for that delicate balance of tenderness and crunch without the gluten’s natural bind. Unlocking this secret transforms every pie into an irresistible masterpiece, whether sweet or savory.
Prep and Cook Time
- Preparation: 20 minutes
- Chilling Time: 1 hour
- Baking Time: 25-30 minutes
Yield
Enough dough for one 9-inch double-crust pie or two single crusts
Difficulty level
Medium: Requires patience and handling but perfect for dedicated home bakers
Ingredients
- 1 cup gluten-free all-purpose flour blend (ensure it contains xanthan gum or add ½ tsp separately)
- ½ cup almond flour for nuttiness and fat content
- 2 tbsp powdered sugar (use for sweet pies; omit for savory)
- ¼ tsp salt
- ½ cup cold unsalted butter, cubed and chilled
- 3-4 tbsp ice-cold water
- 1 tsp apple cider vinegar or lemon juice for tenderizing the dough
- 1 tbsp vodka (optional, evaporates during baking and inhibits gluten formation)
- 1 tsp vanilla extract (for sweet pies)
Instructions
- Mix Dry Ingredients: In a large bowl, whisk together the gluten-free flour blend, almond flour, powdered sugar, and salt until fully combined.
- Cut in the Butter: Using a pastry blender or two knives, cut the cold, cubed butter into the dry ingredients until the mixture resembles coarse peas, with some larger butter pieces intact-these pockets create flakiness during baking.
- Add Liquids: Combine the ice-cold water,apple cider vinegar,vodka (if using),and vanilla extract separately. Gradually sprinkle this into the flour and butter mixture, stirring gently with a fork until a shaggy dough forms.Avoid over-mixing to preserve tenderness.
- Form the Dough: Gently gather the mixture into a ball, pressing it together without kneading. Split dough in half, flatten into disks, wrap each in plastic wrap, and refrigerate for at least 1 hour to hydrate and chill.
- Roll Out: lightly dust your workspace with gluten-free flour.Roll each dough disk between two sheets of parchment paper to approximately ¼-inch thickness. The parchment prevents sticking and preserves dough integrity.
- Assemble Your Pie: Carefully transfer rolled dough to a pie dish. Fill as desired or proceed with shaping your crust edges for decorative flair.
- bake: For blind baking, line crust with parchment and pie weights, bake at 375°F (190°C) for 15-20 minutes until golden. For filled pies, follow the specific recipe baking instructions.
Tips for Success with gluten-free Pie Crusts
- Choose an all-purpose gluten-free flour blend that includes xanthan gum, or add it yourself for elasticity and binding.
- Keep ingredients cold to ensure the butter creates steam pockets that yield flakiness.
- Don’t overwork the dough; gentle mixing preserves the delicate crumb structure.
- Apple cider vinegar or lemon juice tenderizes the dough and brightens flavor.
- Vodka in the dough inhibits gluten (if present from any flour trace) and helps create a tender crust that doesn’t shrink.
- Almond flour adds flavor and richness; substitute with hazelnut flour for an extra nutty profile.
- Blind bake your crust for recipes with wet fillings to avoid sogginess.
Serving Suggestions
Present your gluten-free pie with a flourish-dust the crust edges with powdered sugar or brush with an egg wash for a golden hue. Garnish sweet pies with fresh berries, a sprig of mint, or a dollop of homemade whipped cream. Savory pies pair beautifully with fresh herbs like thyme or rosemary, a crisp green salad, and a drizzle of flavored olive oil for balanced flavors.
| Nutrition (Per slice) | Calories | Protein | Carbs | Fat |
|---|---|---|---|---|
| 1 Slice (1/8 of pie) | 210 | 3g | 14g | 16g |
Explore more about gluten-free baking in our Thorough Guide to Gluten-Free Baking, or discover science-backed tips on flour blends at Celiac Disease Foundation.
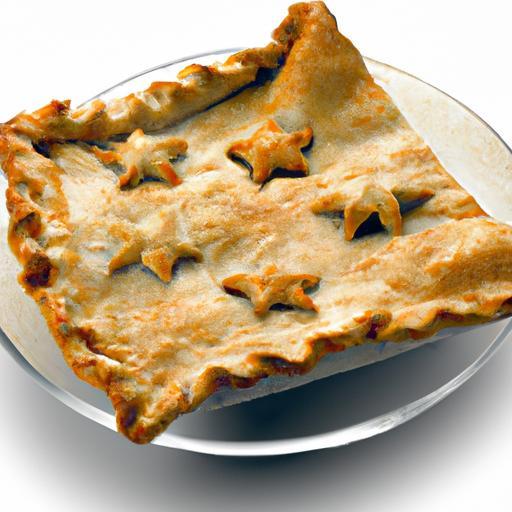
 gluten-free pie crust ready to bake” class=”wp-image-1234″ />
Q&A
Q&A: Flaky & Flavorful – Mastering Gluten-Free Pie Crusts
Q1: Why is making a gluten-free pie crust more challenging than a traditional one?
A1: Gluten is the protein that gives traditional pie crusts their elasticity and structure. Without it, gluten-free dough tends to be more fragile and prone to crumbling. Achieving that delicate balance between tenderness and flakiness requires a thoughtful blend of alternative flours and precise techniques.
Q2: What are the best flours to use for a flaky gluten-free crust?
A2: A combination is key! Almond flour adds a rich, nutty flavor and tenderness, tapioca or arrowroot starch lends elasticity and chew, and rice flour provides structure without heaviness. Many bakers swear by a mix of these, frequently enough paired with a bit of xanthan gum or psyllium husk to mimic gluten’s binding properties.
Q3: Can I use store-bought gluten-free flour blends for pie crusts?
A3: Absolutely. Many commercial gluten-free blends are designed for baking, but they vary widely. Look for blends that include a balance of starches and whole grain flours. Still, for the flakiest crust, you might want to customize your mix or add extra starch, as blends can sometimes produce more crumbly results.
Q4: How vital is fat in gluten-free pie crusts?
A4: Fat is the magic ingredient for flakiness-whether it’s butter, shortening, or even coconut oil.It coats the flour particles, preventing too much water absorption and creating those tender, flaky layers. Using cold fat and incorporating it in small, pea-sized pieces helps create the signature crust texture.
Q5: Are there special tips for rolling out gluten-free dough?
A5: Gluten-free dough can be tricky-it’s less elastic and more fragile. Roll it between two sheets of parchment paper to minimize sticking and tearing. If the dough cracks, gently press it back together with your fingers or patch small tears with extra dough before chilling and baking.
Q6: How can I avoid a soggy gluten-free crust?
A6: Blind baking is your best freind. Pre-bake your crust with pie weights to set the structure before adding fillings, especially for fruit pies. You can also brush the crust with egg wash or a thin layer of melted chocolate to create a moisture barrier.
Q7: What’s the trick to adding flavor without sacrificing texture?
A7: Toss in finely ground nuts like hazelnuts or pecans for depth, or a pinch of cinnamon or cardamom for a subtle warmth. Just be careful not to overdo it-too many add-ins can alter the balance and affect how the crust bakes.
Q8: Can gluten-free pie crusts be made ahead?
A8: Definitely! Wrap your dough tightly in plastic wrap and refrigerate for up to 3 days or freeze for up to a month. When ready,thaw in the fridge,then roll out with care. Pre-baked crusts can also be stored for a couple of days and reheated before filling.
Q9: What’s the bottom line for mastering flaky and flavorful gluten-free pie crusts?
A9: Patience and experimentation. Embrace the unique properties of gluten-free flours, keep your ingredients cold, handle the dough gently, and don’t shy away from blending flours to find your perfect balance. With practice,you’ll create crusts that rival any traditional pie-flaky,flavorful,and utterly irresistible.
To Wrap It Up
With a little practice and the right techniques, crafting a flaky and flavorful gluten-free pie crust is well within your reach. By understanding the unique properties of gluten-free flours and embracing thoughtful substitutions, you can transform your pies into show-stopping creations that everyone will savor-gluten-free or not. So don your apron, gather your ingredients, and let every buttery, crisp bite be a celebration of creativity and culinary confidence. Your perfect gluten-free pie crust awaits!