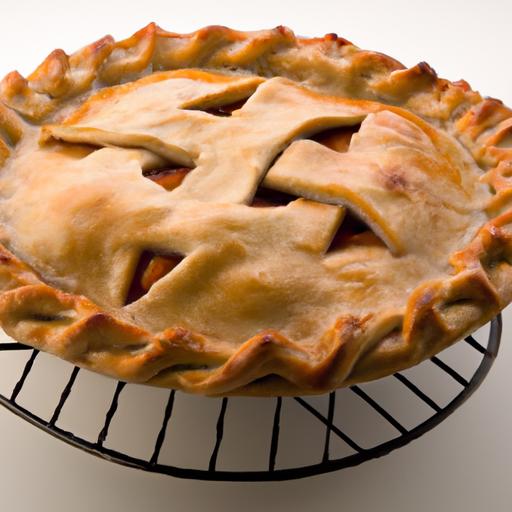
ThereS an art to crafting the perfect pie crust-a delicate balance of flaky layers and mouthwatering flavor that turns any filling into a masterpiece. but what if gluten isn’t part of your repertoire? Fear not: the world of gluten-free baking has blossomed into a vibrant landscape of possibilities, were texture and taste no longer have to take a backseat. In Flaky & Flavorful: The Ultimate Gluten-Free Pie Crust Guide, we’ll unravel the secrets to creating pie crusts that rival their traditional counterparts. From selecting the right flours to mastering mixing techniques and baking tips,this guide is your trusted companion on a journey to gluten-free perfection-one irresistible slice at a time.
Flaky gluten-free pie crusts are the perfect marriage of science, technique, and flavor-a true celebration of what’s possible when you embrace the unique properties of gluten-free flours. Unlike traditional wheat-based crusts, these require a thoughtful balance of ingredients and attention to texture to achieve that signature crumble and tenderness. Drawing on years of culinary experience,I’ve explored the chemistry behind each step,unlocking secrets to create a crust that’s as visually stunning as it is indeed appetizing.
Prep and Cook Time
- Preparation: 25 minutes
- Chilling: 1 hour (minimum)
- Baking: 20-25 minutes (pre-bake) or 35-45 minutes (with filling)
Yield
Enough dough for one 9-inch double crust pie or two 9-inch single crusts.
Difficulty level
Medium: Requires precision but accessible with clear guidance and tips.
Ingredients
- 1 1/4 cups gluten-free all-purpose flour blend (preferably one with xanthan gum included)
- 1/2 cup almond flour, finely ground
- 1/2 teaspoon salt
- 1 tablespoon granulated sugar
- 1 teaspoon baking powder (to help lightness)
- 12 tablespoons (1 1/2 sticks) unsalted cold butter, cut into small cubes
- 1 large egg, lightly beaten
- 3-4 tablespoons ice water, plus more as needed
- 1 teaspoon apple cider vinegar (helps tenderize and improve elasticity)
instructions
- Freeze the butter</ cubes overnight or at least 4 hours; cold fat is essential for flakiness.
- In a large bowl, gently whisk together the gluten-free flour blend, almond flour, salt, sugar, and baking powder until evenly combined.
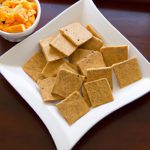
- Using a pastry cutter or clean fingers, cut the cold butter cubes into the flour mixture until it resembles coarse peas and sandy crumbs with some pea-sized pieces remaining.
- In a small bowl, combine the egg, apple cider vinegar, and 3 tablespoons of ice water. gradually pour this into the dry mixture, folding gently with a fork. add more water, 1 teaspoon at a time, if the dough seems dry but avoid overhydrating-it should just hold together when pressed.
- Turn the dough onto a lightly floured surface (using gluten-free flour) and quickly gather it into a disc. Wrap tightly in plastic wrap and chill for at least 1 hour. This resting period lets the starch hydrate and relaxes the dough, preventing toughness.
- When ready, remove the dough and let it warm slightly for 5 minutes to become pliable. Roll out between two sheets of parchment paper to prevent sticking and breakage, aiming for an even 1/8-inch thickness.
- Carefully transfer the crust to a 9-inch pie pan, gently pressing into corners without stretching. Trim the edges, leaving a slight overhang for decorative crimping.
- For recipes requiring blind baking, dock the crust with a fork and line with parchment with pie weights. Bake at 375°F (190°C) for 20-25 minutes until golden and firm but not overly browned.
- Fill and bake as your recipe directs, watching closely to prevent sogginess.
Tips for Success
- Flour choice impacts taste: A blend with tapioca flour and rice flour offers neutral flavor and crisp texture, while almond flour enriches the crust with nuttiness and moisture retention.
- Avoid overworking: Mixing too much develops grainy texture and toughness-handle the dough gently and briefly.
- use apple cider vinegar: It mimics gluten elasticity by tenderizing proteins and enhancing browning.
- Chilling dough: Don’t shortcut chilling-this firms the fat and hydrates starches, key for flaky layers.
- Option fats: For dairy-free options, swap unsalted butter for cold coconut oil solidified in cubes for similar flakiness.
- Make ahead: Dough can be refrigerated for up to 48 hours or frozen up to 1 month-thaw entirely in the fridge before using.
Serving Suggestions
This crust is versatile enough for all your favorite pies, from tart fruit fillings like apple, cherry, or blueberry to rich custards or savory quiches. Garnish with fresh herbs like thyme or rosemary for savory pies, or a dusting of powdered sugar and edible flowers for sweet creations. Serve with a scoop of vanilla bean ice cream or a drizzle of caramel for a show-stopping finish.

| Nutrient | Per Serving (1/8 pie) |
|---|---|
| calories | 230 |
| Protein | 3g |
| Carbohydrates | 12g |
| Fat | 19g |
For more advanced gluten-free baking insights, check out our complete guide on gluten-free baking techniques. For scientific details on how gluten-free flours interact at the molecular level, ScienceDirect’s detailed study offers fascinating research on starch gelatinization and protein behavior.
Q&A
Q&A: Flaky & Flavorful – The Ultimate Gluten-Free Pie Crust Guide
Q1: Why is gluten significant in traditional pie crusts, and what challenges does its absence present?
A1: Gluten acts like a stretchy web that traps air and moisture, creating that perfect balance of flaky layers and structural integrity. Without gluten, pie crusts can turn crumbly, dry, or too dense.The challenge with gluten-free crusts lies in replicating this elasticity and tenderness while still achieving flakiness and flavor.
Q2: What are the best gluten-free flours for pie crusts?
A2: A blend is key! Rice flour offers a neutral base, tapioca starch adds chewiness and elasticity, and almond flour brings richness and moisture. Sweet rice flour helps with binding. Combining these flours thoughtfully creates a crust that’s tender,flaky,and bursting with flavor.
Q3: How do you achieve flakiness without gluten?
A3: The secret is in the fat and temperature. Use cold fats-like butter,shortening,or even coconut oil-in chunks or small pieces,to create tiny pockets of steam as they bake. Chill the dough thoroughly before rolling. And handle it gently-overworking the dough can make it tough rather of flaky.
Q4: Can you make a gluten-free pie crust ahead of time?
A4: Absolutely! gluten-free dough frequently enough benefits from resting in the fridge for at least an hour, which helps hydrate the flours and relaxes the dough. You can even freeze your pie crust dough or pre-baked crust for up to a month-perfect for stress-free pie days.
Q5: Any special tips for rolling out gluten-free dough?
A5: Gluten-free dough tends to be stickier and more delicate. Roll it between two sheets of parchment paper to prevent sticking and tearing.If needed, lightly flour your surface with gluten-free flour blends, but avoid over-flouring to keep the crust tender.
Q6: How do you add flavor to a gluten-free crust?
A6: Don’t be shy-add a pinch of salt, a sprinkle of sugar, or a dash of cinnamon to your dough. Nut flours like almond or hazelnut naturally deepen flavor and texture, while an herb or zest twist can elevate savory pies. Sence gluten-free flours can be mild, these little extras pack a flavor punch.
Q7: What fillings pair best with gluten-free crusts?
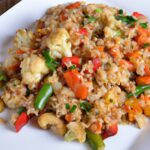
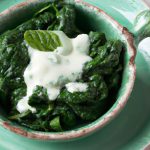
A7: Gluten-free crusts shine with both sweet and savory fillings. Bold, juicy fruit fillings like apple, cherry, or blueberry contrast beautifully with the nutty, crisp crust. For savory pies, try spinach and feta, mushroom and thyme, or classic chicken pot pie-robust flavors hold their own and complement the texture perfectly.
Q8: Is gluten-free pie crust healthier?
A8: “Healthier” depends on what you’re comparing it to. Gluten-free crusts often use nutrient-rich flours like almond or oat, which add fiber and protein. Though, some gluten-free blends contain refined starches that behave differently in the body. the real win is for those with gluten sensitivities or celiac disease, who gain safe access to delicious pie!
Q9: Where can beginners start their gluten-free pie crust journey?
A9: Start simple! Use an established gluten-free flour blend designed for baking and keep ingredients minimal: flour blend, fat, cold water, and a pinch of salt. Practice makes perfect-expect a few experiments before finding your favorite combo. And remember, every slice of homemade, gluten-free pie is a tasty triumph.
With this guide, your gluten-free pies can be just as flaky, flavorful, and fabulous as their traditional cousins. Happy baking!
The Way Forward
Baking the perfect gluten-free pie crust might seem like a delicate dance of science and art, but with the right ingredients and techniques, flaky and flavorful creations are well within your grasp. Whether you’re piecing together a family recipe remake or experimenting with new flavor twists, this guide equips you to transform humble gluten-free flours into golden, buttery crusts that hold their own at any table. So grab your rolling pin, embrace the process, and get ready to savor every bite of your homemade masterpiece-because a truly great pie crust is more than just the foundation; it’s the delicious start to every unforgettable slice.