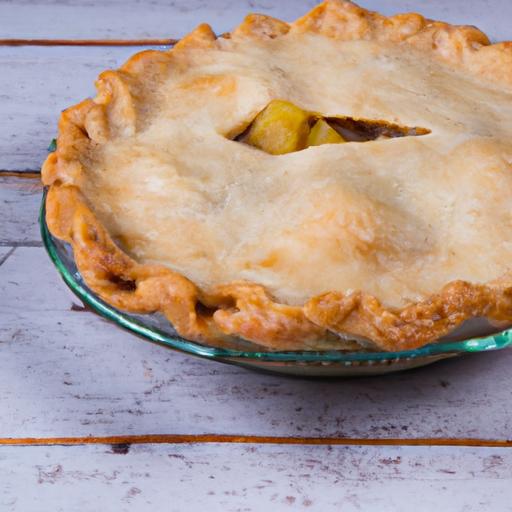
There’s something undeniably magical about a perfectly flaky pie crust-the tender layers that melt in your mouth, the golden edges that whisper of buttery bliss, and the sturdy yet delicate embrace that holds every luscious filling in place. but for those navigating the world of gluten-free baking, achieving this coveted texture can feel like chasing a tasty unicorn. enter “Flaky & Fabulous: Mastering the Perfect Gluten-Free Pie Crust,” your ultimate guide to transforming humble gluten-free ingredients into flaky masterpieces. Whether you’re a seasoned baker or a curious kitchen adventurer, this article will unravel the science, share expert tips, and ignite your confidence to create pie crusts that don’t just stand up to the challenge-they steal the show. Get ready to bake beyond boundaries and savor the true art of gluten-free flakiness.
Understanding Gluten-Free Flours and Their Role in Texture
Flaky & fabulous gluten-free pie crusts begin with the right flour combination-each flour variety brings its own unique texture and function that ultimately defines the final flakiness and tenderness of your crust. Unlike customary wheat flour, gluten-free flours lack natural elasticity, so balancing starches and nutty, protein-rich flours is essential to mimic that characteristic crumb.
As an example, tapioca starch adds that stretchy silkiness, while rice flour contributes a delicate, sandy texture. Almond flour introduces moistness and richness, giving the crust a luxurious mouthfeel, but too much can make it crumbly. Combining them thoughtfully creates a perfectly balanced base that’s easier to work with and bakes up golden and flaky.
Don’t overlook the magic of psyllium husk powder or xanthan gum-thes binders act as pseudo-gluten, holding the dough together gently without sacrificing tenderness.
Techniques to Achieve Flakiness Without Gluten
Creating a flaky crust without gluten takes intentional technique and patience.The hallmark of flakiness lies in fat distribution-small,cold fat pieces melting during baking create pockets that lift and separate the dough layers. Use chilled butter or solid coconut oil, cut into pea-sized pieces and incorporated just until combined, leaving visible chunks. Overworking dissolves those chunks and results in a dense, crumbly crust.
Another critical step is chilling the dough before rolling.Resting allows the starches to hydrate and the fat to firm up, making rolling smoother and preventing tearing. When rolling out, use a light touch and gentle flouring to preserve those cold fat bits. For an extra touch of flakiness, fold the dough with a few quick turns between roll-outs, mimicking traditional laminating techniques without gluten.
Balancing Fat and Liquid for the Ideal Pie dough
Your gluten-free crust’s success depends heavily on the right fat-to-liquid ratio. Too much liquid activates starches excessively, leading to a gummy or tough base; too little and the dough becomes fragile and crumbly. Start with cold liquid like ice water or even chilled apple cider to enhance flavor and keep fat firm.
Using a combination of brittle fats (butter) for flavor and softer fats (like shortening or coconut oil) for tenderness creates an ideal spectrum of texture. Aim for about 1:2 ratio of fat to flour by weight, then adjust liquid gradually. Adding a touch of vinegar or lemon juice can tenderize proteins and enhance flakiness by inhibiting excessive starch bonding.
Troubleshooting Common Gluten-Free Crust Challenges
Even with the best ingredients and techniques, gluten-free crusts can sometimes feel like a puzzle. If your crust is crumbly and cracks when rolling, add small increments of liquid-preferably ice water-to help bind the dough without overhydrating. Too sticky or soft? Ensure fats are properly chilled and minimize handling to reduce warmth. Overly dense or hard crust? Avoid overmixing, which activates starches prematurely.
For cracking crusts during baking, try lining the crust with parchment and weighing it down with pie weights to prevent shrinking. Don’t forget to rest your dough well in the fridge; this breathes life into your gluten-free flakiness.
Prep and Cook Time
- Planning Time: 25 minutes
- Chilling Time: 1 hour
- Baking Time: 20-25 minutes (blind baking) or 45 minutes (filled pies)
Yield
One 9-inch double-crust pie or two 9-inch single-crust pies
Difficulty Level
Medium
Ingredients
- 1 cup gluten-free all-purpose flour (preferably one with xanthan gum included)
- ½ cup almond flour (blanched, finely ground)
- ¼ cup tapioca starch
- 1 teaspoon psyllium husk powder
- ½ teaspoon fine sea salt
- ½ cup unsalted butter, cold, cut into small cubes
- 2 tablespoons solid coconut oil (optional, for tenderness)
- 3-5 tablespoons ice-cold water, plus more if needed
- 1 teaspoon apple cider vinegar or lemon juice
Instructions
- Combine dry ingredients: In a large bowl, whisk together gluten-free all-purpose flour, almond flour, tapioca starch, psyllium husk powder, and sea salt until evenly mixed.
- Cut in fats: Add the cold butter cubes and coconut oil. Use a pastry cutter or clean fingertips to work the fats into the flour mixture until pea-sized lumps remain. These bits ensure flakiness.
- Add liquids: Gently mix ice water and vinegar. Slowly incorporate into the flour-fat mixture, stirring with a fork or your fingers, until a dough begins to form. Add water one tablespoon at a time to avoid stickiness.
- Form, wrap, and chill: gather dough into a ball, flatten into a disk. Wrap tightly with plastic wrap and chill in the fridge for at least 1 hour to hydrate and firm the fats.
- Prepare your workspace: Lightly dust your rolling surface with gluten-free flour blend.Roll the dough gently, turning and flipping to keep even thickness (about ⅛ inch).
- Line pie pan and chill again: Transfer dough to your pan, ease it gently without stretching, trim edges with a sharp knife. Chill for 15-20 minutes before baking for best results.
- Blind bake or fill: For a pre-baked crust, line with parchment paper and fill with pie weights or dried beans. Bake at 375°F (190°C) for 20-25 minutes until golden.For filled pies, add filling and bake according to recipe instructions.
Tips for Success
- Use chilled fats: Keeps the fat solid and creates flakiness as it melts during baking.
- Minimal handling: Overworking breaks down fat and activates starches, making crust tough.
- Gradual hydration: Add liquids slowly to avoid gummy dough.
- Experiment with texture: Slightly adjust almond flour or starch ratios to balance flavor and crumb.
- Make ahead: Dough freezes well-roll out before freezing for super quick prep later.
- Consider a gluten-free pie shield: Prevents edge over-browning during longer bakes.
Serving Suggestions
Serve your flaky gluten-free pie crust filled with seasonal fruit like fresh berry medleys, tart apples, or succulent pumpkin custard. For a rustic, inviting look, sprinkle coarse sugar over the crust edges before baking for sparkle and crunch.
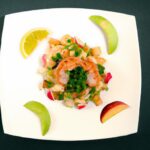
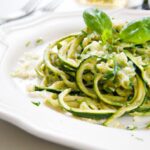
Top sweet pies with a dollop of whipped cream or a scoop of creamy vanilla bean ice cream. Savory pies pair beautifully with fresh herbs like rosemary or thyme sprinkled on top or a fresh arugula salad to balance richness.

| Nutrition (per serving) | Calories | Protein | carbs | Fat |
|---|---|---|---|---|
| 1/8 of crust | 230 | 3g | 21g | 15g |
For more creative gluten-free baking tips, check out our Gluten-Free Baking Basics article. To explore the science behind gluten substitution, this celiac Disease Foundation resource is outstanding.
Q&A
Q&A: Flaky & Fabulous – Mastering the Perfect Gluten-Free Pie Crust
Q: Why is making a gluten-free pie crust more challenging than a traditional one?
A: Gluten is the magic protein that gives traditional pie dough its elasticity and structure. Without it, gluten-free dough can easily become crumbly, tough, or dry. The challenge lies in achieving that delicate balance of tenderness and flakiness without the natural bind and stretch gluten provides.
Q: What’s the secret ingredient to a flaky gluten-free crust?
A: A blend of gluten-free flours is your golden ticket-usually a mix of rice flour, tapioca starch, and maybe a touch of almond meal.But beyond flour, incorporating cold fats like butter or shortening and keeping everything icy cold helps create those signature flaky layers. Some bakers swear by a splash of vodka or apple cider vinegar to tenderize the dough further.
Q: Can I use just one type of gluten-free flour?
A: It’s possible but not ideal. Single gluten-free flours often lack the right texture or binding properties on their own. Combining flours balances taste, texture, and performance. For example, rice flour offers a neutral base, tapioca starch adds chewiness and stretch, and almond flour brings moisture and a slightly nutty flavor.
Q: How important is chilling the dough?
A: Crucial! Chilling solidifies the fats, so when the crust bakes, the melting fat leaves behind delicious pockets of air-hello, flakiness. Plus, cold dough is easier to handle and less sticky, which means less frustration rolling it out and transferring it to your pie dish.
Q: Are there any tips for rolling out gluten-free dough without it breaking apart?
A: Absolutely! Roll the dough between two sheets of parchment paper or plastic wrap to prevent sticking and crumbling. If the edges crack, gently press and patch them with your fingers or a dab of water. Working quickly but gently, and keeping your workspace cool, also helps maintain dough integrity.
Q: What can I do to prevent the crust from shrinking during baking?
A: Avoid overworking the dough, as this can toughen it and encourage shrinkage. Also,prick the crust with a fork (docking) to allow steam to escape. Use pie weights or dried beans to blind bake the crust and keep its shape. And, don’t forget-gluten-free dough can be more sensitive, so handle it with care!
Q: Does the type of fat I use affect the crust?
A: Yes! Butter imparts the richest flavor and yields a flaky texture, but shortening or coconut oil can make handling easier and sometimes result in a sturdier crust.Some bakers blend fats to get the best of both worlds-flavor plus workability.
Q: How can I fix a gluten-free crust that turns out dry or crumbly?
A: Next time, try adding a tablespoon or two of an extra binder like xanthan gum or psyllium husk powder to hold moisture. You can also add a touch more cold liquid (water, milk, or even a splash of vinegar) when mixing. Simultaneously occurring, brushing the baked crust lightly with melted butter can boost moisture and flavor.
Q: Which fillings work best with gluten-free pie crusts?
A: Almost anything! Fruit pies with juicy fillings like apple, cherry, or blueberry work wonderfully, as do cream pies or savory quiches. Just be mindful that very wet fillings may make the crust soggy, so consider blind baking first or adding a protective layer like ground nuts or crushed cookies on the bottom.
Q: Any final words of wisdom for gluten-free pie crust success?
A: Patience and practice are your best friends-gluten-free baking isn’t an exact science but an art. Keep ingredients cold, treat your dough gently, and embrace small imperfections. With a little love and these tips, you’ll turn out flaky, fabulous pies that everyone will savor, gluten-free or not!
The conclusion
As you embark on your gluten-free baking adventures, remember that mastering the perfect pie crust is as much about patience and practice as it is about the right ingredients.with each flaky, fabulous bite, you’re not just creating a dessert-you’re crafting a testament to the art of adaptability and flavor. So, roll up your sleeves, embrace the crumbly charm, and let your gluten-free crust be the golden foundation for countless delicious memories to come. Because with the right technique, every slice can be pure, buttery perfection-gluten-free and guilt-free, too.