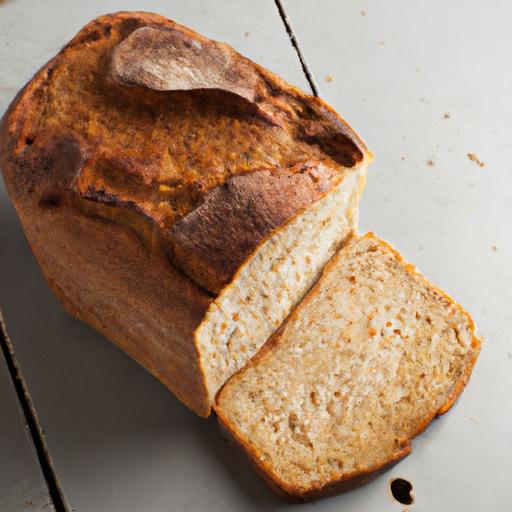

There’s nothing quite like the comforting aroma of freshly baked bread wafting through your kitchen-warm, inviting, and utterly irresistible. For those who navigate the gluten-free lifestyle, however, achieving that perfect loaf can feel like a culinary challenge. Enter the gluten-free bread maker: a game-changing kitchen companion that transforms simple ingredients into soft, flavorful, and beautifully risen bread with ease. In this article, we’ll explore flavorful gluten-free bread maker recipes that take the guesswork out of baking, proving that you don’t need gluten to enjoy extraordinary homemade bread. Whether you’re a seasoned baker or a curious beginner, get ready to fill your home with wholesome loaves that taste as delightful as they look.
gluten-Free Bread Maker Recipes are a game-changer for anyone craving fresh, homemade bread without the worry of gluten. Achieving that perfect texture and crumb can feel elusive, but with the right flour blends, a few flavor boosters, and precise techniques, your bread maker becomes a reliable partner for consistently delicious loaves. Let’s dive into mastering your gluten-free baking craft with approachable tips that brighten every bite.
Prep and Cook Time
Preparation: 15 minutes
Cook Time: 3 hours (including dough rise and baking)
Yield
1 loaf (approximately 12 slices)
Difficulty Level
Easy to Medium – perfect for beginners ready to expand their gluten-free baking skills
Ingredients
- 2 cups gluten-free flour blend (see notes for blend suggestions)
- 1 cup warm water (about 110°F/43°C)
- 2 tablespoons olive oil or melted coconut oil
- 2 teaspoons active dry yeast
- 1 tablespoon sugar (helps feed the yeast)
- 1 teaspoon xanthan gum (if your flour blend doesn’t contain it)
- 1 teaspoon salt
- 2 large eggs (room temperature for improved rise)
- Optional add-ins: 1/4 cup chopped walnuts,2 tablespoons flaxseeds,1 tablespoon fresh rosemary
Instructions
- Prepare your bread maker: Insert the paddle and ensure your bread pan is clean and dry.
- Activate yeast: In a small bowl, combine warm water, sugar, and yeast. Let it sit for 5-7 minutes until foamy, signaling live yeast.
- Mix wet ingredients: Pour yeast mixture into the bread pan, then add olive oil and eggs.
- Combine dry ingredients: In a separate bowl, whisk together gluten-free flour blend, salt, and xanthan gum.
- Add dry ingredients to bread pan: Slowly add the flour mixture on top of the wet ingredients-do not stir.
- Add flavor boosters: If using nuts, seeds, or herbs, add them now. these will infuse subtle aromas and delightful texture variations.
- Select program: Choose the gluten-free cycle on your bread maker (typically the shortest rise and bake time).
- Start baking: Press start, keeping an eye on the dough during the initial mixing phase.The consistency should resemble a thick, sticky batter; if too dry, add water a teaspoon at a time, too wet, add a bit more flour.
- remove immediately after baking: Once the cycle ends, remove the loaf and cool on a wire rack to prevent sogginess. Let it rest at least 30 minutes before slicing to set the crumb.
Tips for Success: Achieving That Perfect Gluten-Free Loaf
- Choose your flour blend wisely. A balanced blend of rice flour, tapioca starch, and potato starch often yields the best structure and crumb.
- Incorporate binders wisely. If your blend lacks xanthan gum or guar gum, adding one teaspoon helps trap moisture and elasticity.
- Hydration is key. Gluten-free doughs need slightly more moisture than customary doughs-don’t hesitate to adjust water in small increments.
- Flavor boosters elevate everything. Consider herbs like rosemary, seeds like sunflower or chia, or even dried fruits for a sweet touch.
- Keep ingredients at room temperature. This helps yeast activation and results in a lighter loaf.
- Timing matters. Cool the bread completely before slicing; cutting too soon can cause crumbling or gummy texture.
Serving Suggestions
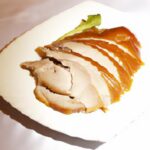
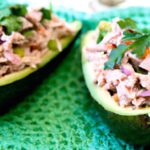
Serve your gluten-free bread fresh and warm, slathered with creamy avocado spread or tangy goat cheese. For breakfast, a smear of almond butter and honey make a comforting start, while toasted slices pair perfectly with hearty soups or vibrant salads. Garnish with fresh herbs like thyme or a dusting of paprika for a rustic,artisanal touch.
| Nutrient | Per Slice (1/12 loaf) |
|---|---|
| calories | 110 |
| Protein | 3g |
| carbohydrates | 19g |
| Fat | 3g |
Learn more about gluten-free lifestyles at Celiac Disease Foundation.
Discover more about gluten-free baking in our gluten-free muffin recipes collection for delightful companion treats.

Q&A
Q&A: Gluten-Free Bread Maker Recipes – Delicious Loaves Made Easy
Q1: Why choose a bread maker for gluten-free baking?
A1: Gluten-free baking can be tricky-gluten’s absence means doughs behave differently, frequently enough sticky or dense. A bread maker takes out the guesswork with precise kneading, temperature control, and perfect rise times. It transforms what can be a frustrating process into a hands-off, foolproof experience, delivering consistent, fluffy gluten-free loaves with minimal effort.
Q2: what are the key ingredients for a prosperous gluten-free bread recipe in a bread maker?
A2: Unlike traditional bread, gluten-free recipes rely on a medley of gluten-free flours (like rice, sorghum, or almond), starches (potato starch, tapioca), and crucial binders such as xanthan gum or psyllium husk to mimic gluten’s elasticity. Don’t forget the right balance of moisture-eggs, oil, or applesauce help keep the bread tender and moist. And yeast? It’s still king, but gluten-free yeast doughs often need a little extra rise time programmed in.
Q3: Can I simply swap regular flour for gluten-free flour in any bread maker recipe?
A3: Not quite. Gluten-free flours behave very differently,so a simple 1:1 flour swap will usually result in disappointing bread-too crumbly,dense,or gummy. Gluten-free bread recipes are specifically formulated with the right flour blends, hydration levels, and rising times designed for bread makers to work their magic.
Q4: How do I adjust my bread maker settings for gluten-free bread?
A4: Many modern bread makers include a dedicated gluten-free setting, which adjusts kneading, rising, and baking times for best results.if yours doesn’t, choose a “quick bread” or “cake” cycle, as gluten-free doughs often rise faster and require gentler mixing. Avoid heavy kneading-gluten-free doughs don’t need the same stretch as traditional dough.
Q5: What’s a simple and tasty gluten-free bread maker recipe to get started?
A5: Try this easy favorite: Combine 1 1/2 cups brown rice flour,1/2 cup tapioca starch,1/4 cup potato starch,1 tsp xanthan gum,1 1/2 tsp instant yeast,1 1/4 tsp salt,2 tbsp sugar,1 cup warm water,2 tbsp olive oil,and 2 beaten eggs. Add to your bread maker, select the gluten-free setting, and let the magic happen. The result? A golden, tender loaf perfect for sandwiches or toast.
Q6: How can I make my gluten-free bread taste better and last longer?
A6: Adding natural flavor enhancers like honey, herbs, or roasted garlic can elevate the taste. For lasting freshness, store your loaf in an airtight container or freeze slices right away. Some bakers swear by adding a spoonful of apple cider vinegar-it helps preserve moisture and softness. Reheating slices lightly in a toaster or oven revives that fresh-baked vibe every time.
Q7: Any expert tips for gluten-free bread maker success?
A7: Patience is key! Gluten-free doughs often need a little extra rise time. Don’t open the bread maker lid early-the sudden temperature change can make your loaf collapse. experiment with flour blends to find what you love most-each blend brings subtle texture and flavor differences. And keep a baking journal: tweak ingredients and settings, then note what worked best. soon, you’ll be crafting gluten-free loaves that rival any bakery!
Whether you’re new to gluten-free baking or a seasoned pro, your bread maker is a trusty ally ready to deliver delicious, hassle-free loaves. With the right recipes, ingredients, and a splash of patience, you can enjoy fresh, homemade gluten-free bread anytime-warm, fragrant, and utterly satisfying. Happy baking!
Concluding Remarks
Baking your own gluten-free bread doesn’t have to be a daunting task reserved for expert bakers. with the right recipes and a trusty bread maker by your side, you can effortlessly create delicious, wholesome loaves that cater to your dietary needs and tantalize your taste buds. whether you prefer a soft sandwich bread or a hearty artisan-style loaf, these gluten-free bread maker recipes unlock a world of flavors and textures that prove gluten-free can also mean indulgent and satisfying. So, gather your ingredients, fire up your machine, and savor the comfort of fresh-baked bread-free from gluten but full of goodness and homemade charm.