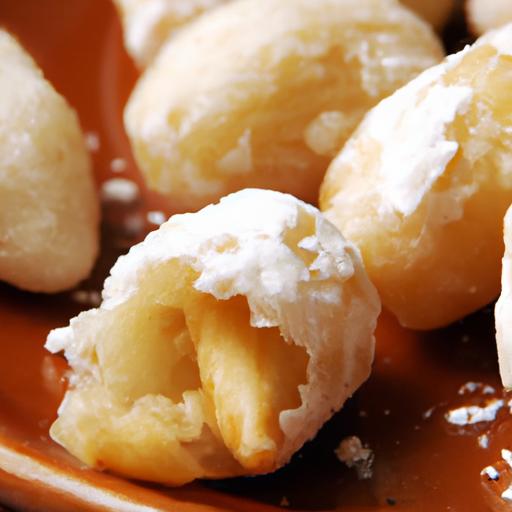
There’s a certain magic in the simplicity of conventional sweets-a harmony of humble ingredients that come together to create flavors steeped in culture and nostalgia. Among these cherished treats,pastillas hold a special place in Filipino hearts,embodying the sweet warmth of home and heritage.This soft, milky confection, wrapped delicately in colorful cellophane, isn’t just a candy; it’s a story passed down through generations. In this article, we’ll unravel the sweet tradition of making classic pastillas at home, guiding you step-by-step to create your own batch of these melt-in-your-mouth delights. Whether you’re a curious foodie or a lover of heritage desserts, prepare to embark on a delicious journey that celebrates simplicity, family, and the joy of homemade goodness.
Sweet Tradition: How to Make Classic Pastillas at Home
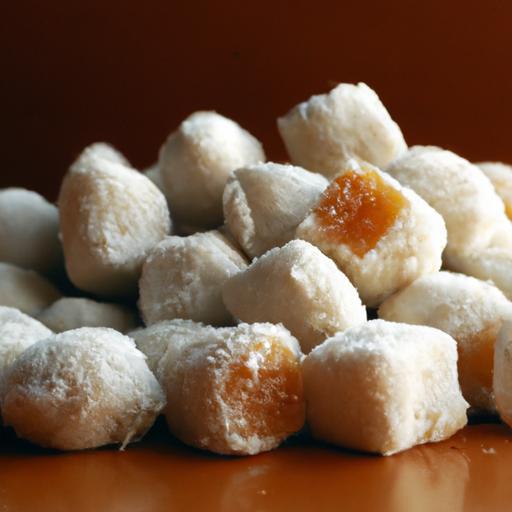
Pastillas, a beloved Filipino sweet tradition, captures the heart of home with every bite. This soft, milky confection, made from simple ingredients, embodies centuries of heritage wrapped in silky, buttery morsels. Whether savored during fiestas or as an everyday indulgence, pastillas celebrate the warmth of Filipino culture and family gatherings.
Prep and Cook Time
- Planning Time: 15 minutes
- Cooking Time: 15 minutes
- Total Time: 30 minutes
Yield
Approximately 40-50 pastillas, depending on size
Difficulty Level
Easy - Perfect for beginners and seasoned cooks alike
Essential Ingredients and tips for Selecting the Perfect Milk
the true magic of sweet tradition pastillas lies in the quality of milk used.Traditionally, fresh carabao milk is prized for its creamy richness and slightly tangy depth. However, high-quality canned or powdered whole milk brands also yield wonderfully smooth results. look for milk with a high-fat content for a luscious texture that melts on your tongue. Avoid low-fat or skimmed versions, which result in crumbly pastillas.
Supplementing fresh milk with sweetened condensed milk adds just the right amount of sweetness and ensures a silky-smooth consistency.Together, these ingredients create the perfect balance that defines this Filipino delicacy.
Ingredients
- 2 cups powdered milk (preferably full cream)
- 1 cup sweetened condensed milk
- 4 tablespoons unsalted butter, softened
- 1/4 teaspoon vanilla extract (optional)
- Granulated sugar, for rolling (about 1/2 cup)
Step-by-Step Guide to Crafting Silky Smooth Pastillas at Home
- Combine the dry and liquid ingredients: In a large mixing bowl, sift the powdered milk to remove lumps. Add the sweetened condensed milk and softened butter. Mix gently with your hands or a spatula until it forms a smooth, pliable dough. The mixture should be soft enough to roll but not sticky.
- Add the flavor: Stir in the vanilla extract to imbue subtle warmth and aroma.
- Chill the mixture: Cover the dough with plastic wrap and refrigerate for 10-15 minutes.This step firms it slightly and makes shaping easier.
- Shape the pastillas: pinch off small portions (about one tablespoon each). Roll between your palms into smooth, cylindrical or oval shapes. Consistency in size ensures even sweetness and a beautiful presentation.
- Coat with sugar: Lightly roll each piece in granulated sugar for a delicate crunch and added sweetness. Place the finished pastillas on a lined tray.
- Rest and serve: Allow pastillas to set at room temperature for 30 minutes or refrigerate for firmer texture before serving.
Creative Variations and Serving Ideas to Elevate Your Pastillas Experience
While the classic pastillas shine with their pure milk essence, exploring creative twists can elevate your sweet tradition. Add a small teaspoon of ube halaya (purple yam jam) into the dough for a swirl of color and flavor. For a nutty crunch, fold in finely chopped cashews or pili nuts. Alternatively, roll pastillas in finely crushed toasted coconut flakes or ground pistachios instead of sugar for a unique texture and taste.
serve your pastillas wrapped individually in colorful cellophane or delicate Japanese paper for festive events or gifting. Pair these milky delights with a warm cup of Brewed Barako coffee for an authentic Filipino afternoon snack experience. To discover more filipino desserts, check out our Filipino Desserts Guide.
Chef’s Notes & Tips for Success
- Ensure the butter is softened but not melted to blend evenly without separating the dough.
- If the mixture feels too dry, add a teaspoon of cream or milk one at a time; if too wet, sprinkle more powdered milk.
- Work with slightly chilled dough to prevent stickiness while shaping.
- Store pastillas in an airtight container at room temperature for up to 3 days or refrigerate for up to a week.
- For a vegan version, substitute butter with coconut oil and use plant-based condensed milk alternatives.
Serving Suggestions
- Present pastillas on a decorative platter, sprinkled with edible gold dust or colorful sugar crystals for a festive look.
- Wrap each piece in wax paper twists or cellophane ribbons to gift during holidays or celebrations.
- Accompany the pastillas with fresh fruits such as mango slices or ripe bananas for a harmonious balance of flavors.
- Create a dessert board featuring pastillas alongside other filipino sweets to impress guests.
| Nutritional Info (per serving) | amount |
|---|---|
| Calories | 110 kcal |
| Protein | 3 g |
| carbohydrates | 18 g |
| Fat | 3.5 g |

Q&A
Q&A: Sweet Tradition – How to Make Classic Pastillas at Home
Q1: What exactly are pastillas, and why are they considered a classic Filipino treat?
A1: Pastillas, also known as pastillas de leche, are soft, sweet milk candies traditionally made in the Philippines. their creamy,melt-in-your-mouth texture and simple ingredients reflect the country’s rich dairy heritage and festive spirit.These delightful morsels are often wrapped in colorful papel de japon, making them a staple in celebrations and a nostalgic taste of Filipino homegrown sweetness.
Q2: What are the main ingredients used in making classic pastillas?
A2: The heart of classic pastillas lies in just two main ingredients: evaporated milk and sugar. Some recipes add a bit of unsalted butter or powdered milk for extra creaminess and richness.The simplicity of these ingredients lets the pure, milky flavor shine through, turning humble pantry staples into a luscious treat.
Q3: How can I make pastillas at home without special equipment?
A3: Great news-making pastillas at home requires minimal tools! Just a mixing bowl, a spatula or wooden spoon, and your hands for shaping. After gently heating evaporated milk and sugar until thickened, you let the mixture cool slightly before rolling it into bite-sized cylinders or balls. No fancy gadgets needed-just patience and a little love.
Q4: How do you achieve the perfect pastillas texture?
A4: The secret to smooth, creamy pastillas is slow and gentle stirring while heating the milk and sugar mixture. Overcooking will make them too hard; undercooking leaves them sticky. When the mixture thickens enough to hold its shape but still feels soft, it’s time to cool and shape. It’s all about that tender balance-rich yet delicate.
Q5: Can I customize pastillas with different flavors or coatings?
A5: Absolutely! While classic pastillas are often dusted with powdered milk or sugar, creativity is encouraged. Add chopped nuts like pistachios or cashews for crunch, a hint of vanilla or pandan essence for fragrant twists, or roll them in desiccated coconut for extra texture. The sweet tradition welcomes your personal flair.
Q6: How long do homemade pastillas stay fresh?
A6: Stored in an airtight container in a cool, dry place, homemade pastillas can last up to two weeks. For longer storage, refrigerate them, but bring them back to room temperature before serving for that perfect melt-in-the-mouth feel.
Q7: What’s the best way to serve and enjoy pastillas?
A7: pastillas are perfect petite bites at any gathering-serve them as sweet party favors,alongside tea or coffee,or as a charming homemade gift. Unwrap a pastel-colored paper, savor the creamy sweetness, and take a delicious step into Filipino tradition.
Q8: Any tips for first-timers making pastillas?
A8: Keep your heat moderate to avoid scorching the milk, stir consistently but gently, and don’t rush the thickening process-it’ll reward you with that luscious texture. And most importantly, have fun! pastillas-making is as much about the joy in crafting as it is in tasting the final sweet creation.
In Conclusion
Crafting your own batch of classic pastillas is more than just a culinary project-it’s a sweet journey into tradition, flavor, and the heart of home. With simple ingredients and a little patience, you can recreate this beloved Filipino treat that has delighted generations. Whether you’re sharing them with family, gifting them to friends, or simply savoring a bite of nostalgia, homemade pastillas bring a touch of sweetness to any day. So roll up your sleeves, embrace the time-honored method, and let each creamy, sugary bite remind you that some traditions are best enjoyed fresh from the kitchen. Happy sweet making!