There’s something undeniably magical about pastillas-a delicate confection that melts on your tongue, carrying with it echoes of cherished celebrations and family gatherings. This classic Filipino sweet, crafted from creamy milk and sugar, has been a beloved treat for generations, bridging past and present with every bite. Whether you grew up savoring pastillas wrapped in colorful papel de japon or are discovering this delightful candy for the first time, making them at home is a rewarding journey into tradition and flavor. In this article, we’ll guide you through the timeless steps of creating your own luscious pastillas, unlocking a sweet heritage that’s as rich in history as it is in taste.
Sweet traditions: how to Make Classic Pastillas at Home
Sweet traditions come alive with the enchanting simplicity of pastillas-a beloved filipino confection renowned for its creamy texture and delicate sweetness. This treat, crafted from tender milk and sugar, carries stories of family gatherings and festive celebrations, making it much more than just a dessert. Whether you grew up savoring its milky softness or are discovering it for the first time, mastering the art of pastillas offers a flavorful way to connect with culture and heritage.
Prep and Cook Time
- preparation: 15 minutes
- Cooking: 25 minutes
- Total Time: 40 minutes
Yield
About 30 small pastillas (depending on desired size)
Difficulty Level
Easy to medium – Perfect for beginner and intermediate home chefs
Choosing the Best Ingredients for Authentic and Creamy Pastillas
Authenticity starts with quality. For irresistibly creamy and smooth pastillas, fresh carabao’s milk (buffalo milk) is the gold standard because of its richer fat content, but whole cow’s milk works beautifully when fresh. Pair your milk with granulated white sugar or, for a subtler caramel note, raw cane sugar. Many traditional recipes call for condensed milk to enhance creaminess and sweetness in a hassle-free way, while a dash of butter adds that luxuriously smooth mouthfeel.Keep your ingredients fresh and avoid powdered or long-life products for the truest taste.
Step-by-Step Guide to Crafting Perfectly Soft and Sweet Pastillas
- Combine Milk and Sugar: In a heavy-bottomed saucepan, pour 2 cups fresh whole milk along with 1 cup granulated sugar. Stir gently over medium heat until the sugar dissolves completely, about 3 minutes.
- Slowly Simmer and Reduce: Lower the heat to medium-low and let the mixture gently bubble and thickens, stirring constantly to prevent scorching. This can take about 20-25 minutes. Aim for a custard-like consistency that coats the back of a spoon.
- Add Butter and Evaporated Milk: Stir in 2 tablespoons of unsalted butter and ¼ cup evaporated milk. Continue stirring and cooking until the mixture is thick, glossy, and pulls away from the pan’s sides.
- Cool the Mixture: pour the softened thickened milk paste onto a greased baking sheet or parchment paper. Let it cool to room temperature, then refrigerate for at least 1 hour to firm up for easier shaping.
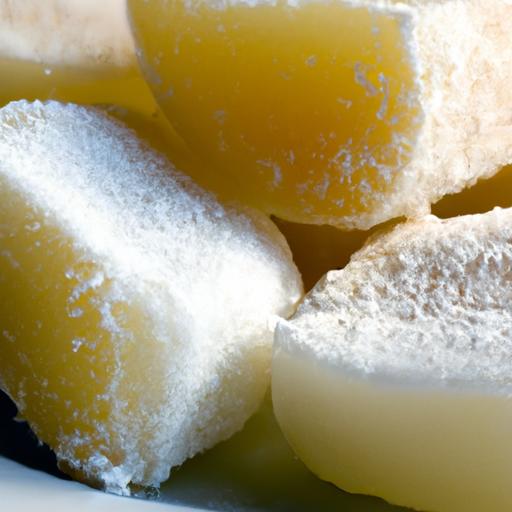
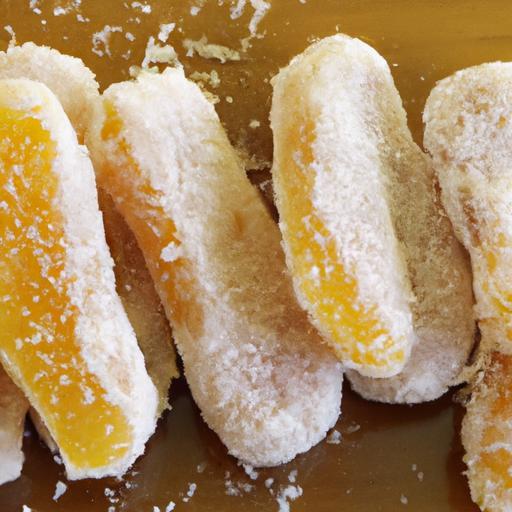
- Shape the Pastillas: Using lightly buttered hands, scoop about 1 tablespoon of the cooled mixture and roll it into smooth logs or balls. Roll each piece generously in granulated sugar for that iconic sugary crust.
- Chill and Serve: Place the finished pastillas in an airtight container and chill for 30 minutes before serving to enhance texture and flavor cohesion.
creative Variations and Serving Suggestions to Delight Your taste Buds
Classic pastillas are a canvas for delightful twists. Incorporate finely chopped pistachios, cashews, or toasted coconut flakes into the dough for added texture and nutty richness. for flavor boosts, consider swirling in vanilla extract, pandan essence, or even a splash of rosewater. Chocolate lovers can dip the finished pastillas into dark chocolate or roll them in cocoa powder for an indulgent flair.
Present your pastel delights nestled in colorful cupcake liners or wrapped in traditional white Japanese paper to echo their festive roots. Garnish with edible gold leaf or a light dusting of powdered sugar for an elegant touch that elevates this humble treat.
Serving Suggestions
- Serve chilled with a hot cup of salabat (ginger tea) or barako coffee for an authentic Filipino experience.
- Pair with fresh tropical fruits like mango slices or ripe pineapple to balance creamy sweetness with bright acidity.
- Use pastillas as a decadent filling for crepes or as a topping for vanilla ice cream to create unique desserts.
Tips for Success
- Stir constantly during cooking to avoid burning-the mixture’s sugar content is prone to sticking and scorching.
- Adjust cooking time depending on milk type; carabao’s milk thickens faster due to higher fat content.
- Refrigerate the milk mixture overnight for easier handling and firmer pastillas.
- For a dairy-free version, experiment with full-fat coconut milk, but expect a softer texture and different flavor nuances.
| Nutritional Info (per piece) | Amount |
|---|---|
| Calories | 80 kcal |
| Protein | 1.5 g |
| carbohydrates | 14 g |
| Fat | 2.5 g |
Discover more delightful Filipino desserts in our Filipino Desserts Guide and explore the rich diversity of sweet traditions. For cultural insights on dairy in Filipino cuisine,visit Filipino Milk culture.

Q&A
Q&A: Sweet Traditions – How to Make Classic Pastillas at Home
Q: What exactly are pastillas, and why are they considered a classic Filipino treat?
A: pastillas are bite-sized, silky-smooth milk candies made traditionally from carabao’s milk and sugar. They’re a quintessential Filipino dessert that delight generations with their creamy texture and sweet, nostalgic flavors. Often wrapped in colorful paper, pastillas aren’t just sweets; they’re symbols of warmth, family gatherings, and festive celebrations.
Q: Can I make pastillas using regular cow’s milk, or do I need the traditional carabao’s milk?
A: While carabao’s milk gives pastillas their signature richness and velvety mouthfeel, you can absolutely use whole cow’s milk as a convenient substitute at home. The result will still be delicious, just with a slightly different creaminess. The magic lies in the slow cooking and patient stirring!
Q: What are the main ingredients needed to make classic pastillas at home?
A: Simplicity is key! You’ll need sweetened condensed milk, powdered sugar (for dusting or coating), and butter or margarine to add that luscious smoothness. Some recipes also include a touch of vanilla extract for extra aroma, but the star is always the milk’s natural sweetness.
Q: How do I achieve the perfect texture? Soft and creamy, not gritty or too hard?
A: The secret is low and slow cooking with constant stirring. It takes about 30-45 minutes of gentle simmering to thicken the milk mixture into the perfect fudge-like consistency. Once it holds together and no longer sticks to the pan, transfer it to a cool surface to knead until soft. Dust generously with powdered sugar before shaping-this keeps them tender and prevents sticking.
Q: Can I get creative with flavors and coatings?
A: Absolutely! While classic pastillas rely on pure milk sweetness, modern twists include adding crushed nuts, ube (purple yam) flavor, or even coating them in toasted coconut flakes. Wrapping them in colorful cellophane or banana leaves adds that authentic festive vibe, perfect for gift-giving or party treats.
Q: How long do homemade pastillas last, and how should I store them?
A: When stored in an airtight container at room temperature, pastillas usually stay fresh for about a week. If it’s humid, placing them in the refrigerator can prolong their shelf life but may slightly harden their texture.Let them come to room temperature before serving for the best melt-in-your-mouth experience.
Q: any tips for beginners who want to try making pastillas for the first time?
A: Patience and loving care are your best allies. Stir constantly to avoid burning,and don’t rush the thickening process.Use a non-stick pan for easier cooking and cleanup. Most importantly, enjoy the process-it’s a sweet tradition connecting you to Filipino culture, one creamy bite at a time!
In Retrospect
As you wrap up your batch of pastel-hued pastillas, remember that this sweet tradition is more than just a treat-it’s a delicious link to heritage and heart. Making pastillas at home invites you to slow down, savor simple ingredients, and create moments that linger on the tongue and in memories. Whether shared with family or gifted to friends, each bite carries a taste of time-honored joy. So next time you crave a little sweetness with a story, let your kitchen become a haven for this classic delight, keeping the past alive one luscious pastilla at a time.