When the summer sun blazes and the world seems to slow down in the heat, nothing quite hits the spot like a generous scoop of ice cream. But instead of reaching for store-bought tubs loaded with preservatives and artificial flavors, why not take a moment to create your own wholesome homemade delight? in this article, we’ll guide you through crafting a creamy, dreamy ice cream recipe that’s as nourishing as it is refreshing. From selecting natural ingredients to mastering the perfect texture, get ready to chill out right and savor every luscious bite of your very own frozen masterpiece.
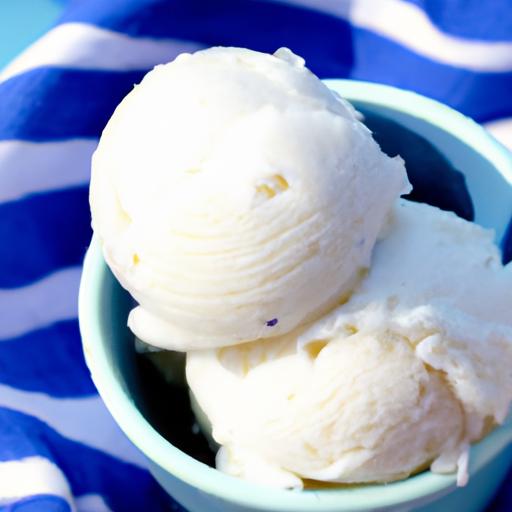
Chill Out Right: Wholesome Homemade Ice Cream Recipe begins with selecting the creamiest, freshest ingredients to ensure that every luscious spoonful melts seamlessly on your palate. Achieving that perfect texture and flavor starts well before the churning process-it’s all about understanding your dairy, sweeteners, and natural infusions.Let’s dive into the essential elements and clear, inspiring steps that will make your homemade ice cream a showstopper in both taste and appearance.
Prep and Cook Time
- Preparation: 20 minutes
- Chilling: 4 hours (or overnight for best texture)
- Churning: 25 minutes
- total time: Approximately 5 hours and 10 minutes
Yield
Generously serves 6 peopel, perfect for sharing delightful moments.
Difficulty Level
Medium – approachable for home cooks ready to elevate their dessert game with natural ingredients.
Ingredients
- 2 cups heavy cream, cold
- 1 cup whole milk, cold
- ¾ cup organic honey (or pure maple syrup for a vegan twist)
- 5 large egg yolks, room temperature
- 1 tablespoon pure vanilla extract
- Pinch of fine sea salt
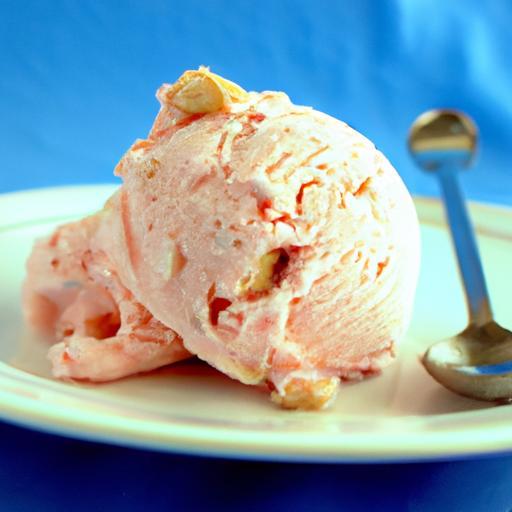
- Optional: ½ cup crushed toasted nuts, fresh fruit pieces, or dark chocolate chips for mix-ins
Instructions
- warm the base: in a medium saucepan, combine the heavy cream and whole milk. Heat over medium until it just begins to steam-avoid boiling to keep the dairy silky.
- Whisk yolks and sweetener: while the cream warms, whisk together the egg yolks and honey in a large bowl until the mixture is pale and slightly thickened.
- Temper the eggs: Slowly pour about ½ cup of the warm cream mixture into the yolks while whisking vigorously. This step gently raises the yolks’ temperature, preventing them from scrambling.
- Combine and cook: Pour the tempered yolk mixture back into the saucepan. Stir constantly with a wooden spoon or heatproof spatula over medium-low heat until the custard thickens enough to coat the back of the spoon-about 8 minutes. This is your creamy canvas.
- Strain and chill: Pour the custard through a fine mesh sieve into a clean bowl to remove any cooked egg bits. Stir in the vanilla extract and a pinch of sea salt to enhance flavor depth. cover with plastic wrap, pressing it directly on the surface to avoid a skin forming, and refrigerate for at least 4 hours or overnight.
- Churn to perfection: Once chilled,pour the custard into your ice cream maker. Churn according to the manufacturer’s instructions, usually about 25 minutes, until it reaches a soft-serve consistency.
- Add mix-ins: During the last 5 minutes of churning, fold in your choice of add-ins like toasted nuts, fresh berries, or dark chocolate chips for texture and bursts of flavor.
- Freeze to set: Transfer the ice cream to an airtight container. Freeze for at least 2 hours to firm up to scoopable perfection.
Chef’s Notes
- Enhance creaminess: For ultra-silky results, substitute half of the milk with full-fat coconut milk, which also pairs beautifully with natural sweeteners.
- Sweetener swaps: Agave nectar or brown rice syrup works well if avoiding honey; remember to adjust quantity depending on sweetness.
- Flavor infusions: Steep herbs like fresh mint or basil in the warm cream for 15 minutes before straining to create refreshing herbal notes.
- Egg safety: To ensure safety with raw egg yolks, consider using pasteurized eggs or gently heating custard to 160°F (71°C).
- Make ahead: Prepare the custard base a day in advance to streamline your dessert day and deepen flavor melding.
Serving Suggestions
This wholesome homemade frozen delight shines best when plated thoughtfully. Scoop vibrant, creamy ice cream into chilled bowls or cones.Garnish with fresh berries, a drizzle of dark chocolate sauce, or a sprinkle of toasted nuts for contrast and crunch. A fresh mint leaf or edible flower can add a visually stunning finish that invites smiles.

| Nutrient | Amount per serving |
|---|---|
| Calories | 230 kcal |
| Protein | 4 g |
| Carbohydrates | 20 g |
| Fat | 15 g |
For more wholesome dessert inspiration, check out our thorough guide to natural sweeteners and explore their magic in home cooking!
Q&A
Q&A: Chill Out Right with a Wholesome Homemade Ice Cream Recipe
Q1: Why make homemade ice cream instead of buying it from the store?
A1: Homemade ice cream lets you control every ingredient, ensuring it’s wholesome and free from hidden preservatives or excessive sugars. Plus,it’s a fun,creative process that fills your kitchen with delightful aromas and the promise of pure,personalized indulgence.
Q2: What makes this homemade ice cream “wholesome”?
A2: This recipe focuses on natural, high-quality ingredients – think fresh cream, real fruit, natural sweeteners like honey or maple syrup, and no artificial colors or flavors.It’s a treat that’s as nourishing as it is indeed appetizing, perfect for those who want to enjoy dessert without guilt.
Q3: Can I customize this recipe for different flavors or dietary needs?
A3: Absolutely! Wholesome homemade ice cream is a blank canvas. Swap in coconut or almond milk for dairy-free versions, mix in your favorite fruits or nuts for texture and flavor, or reduce sugar by using ripe bananas or dates for natural sweetness.
Q4: What’s the key to getting that perfect creamy texture without fancy equipment?
A4: Patience and technique! Chilling your mixture thoroughly before freezing and stirring it regularly during the freezing process breaks up ice crystals, creating a smooth, creamy texture. No ice cream machine? No problem – a simple fork or whisk and a little elbow grease will do the trick.
Q5: How can I store homemade ice cream to keep it fresh and tasty?
A5: Store your ice cream in an airtight container to prevent freezer burn and ice crystals from forming.press a piece of parchment paper directly onto the surface before sealing the lid to keep it extra fresh. For best taste, enjoy within two weeks-even though it’s hard to resist eating it much sooner!
Q6: what are the benefits of making ice cream at home for family and friends?
A6: Sharing homemade ice cream creates joyful moments and memories. you can tailor treats to everyone’s tastes and dietary needs, celebrate seasonal ingredients, and teach kids about cooking and wholesome eating. Plus, it’s a perfect way to cool down and chill out together, right in your own kitchen!
Key Takeaways
As the summer sun warms your days and sweet cravings call, there’s nothing quite like the comfort of a creamy, homemade ice cream crafted with care. By choosing wholesome ingredients and a simple process, you not only treat your taste buds but also create a delicious ritual that refreshes both body and soul. So next time you’re ready to chill out right, remember: the best ice cream isn’t just a dessert-it’s a joyful experience made all the richer by your own hands. Scoop up your favorite flavors, savor each bite, and let this wholesome homemade delight become a staple in your kitchen and your heart.