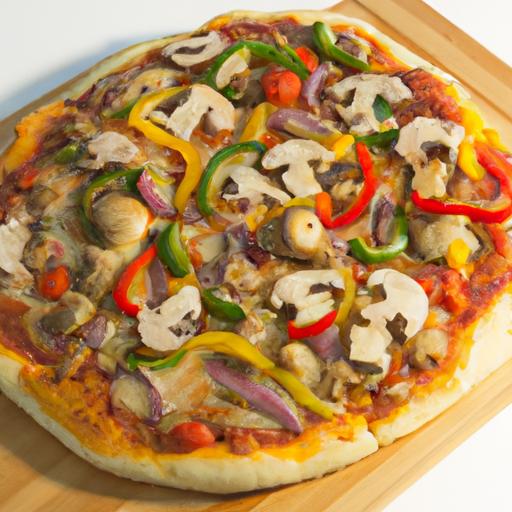
There’s something undeniably irresistible about pizza-the golden, crispy crust, the bubbling cheese, and the savory toppings all coming together in perfect harmony. But for those who avoid gluten, finding a pizza crust that’s both mouthwateringly delicious and satisfyingly crisp can feel like a culinary quest. Fear not! Gluten-free pizza crusts have evolved far beyond the crumbly, flavorless options of the past. In this article, we’ll dive into the art of crafting a gluten-free pizza crust that’s crispy, flavorful, and surprisingly easy to master at home. Whether you’re a seasoned gluten-free baker or a curious newbie, these tips will have you savoring every slice without compromise.
Gluten-free pizza crusts don’t have to meen sacrificing that coveted crispy, golden base that defines a truly great pie. Choosing the perfect gluten-free flours is the foundation for achieving that satisfying crunch and flavor which often eludes gluten-free baking. With the right blend of flours, mastering dough readiness, and employing smart baking techniques, your pizza crust will rival-and even exceed-traditional versions in both taste and texture.
Prep and Cook Time
- Preparation: 20 minutes
- rising time: 1 hour
- Baking time: 15-18 minutes
- Total time: Approximately 1 hour 40 minutes
Yield
- Makes 1 large 12-inch pizza crust (serves 2-3)
Difficulty Level
- Medium – perfect for home bakers ready to experiment and elevate their gluten-free pizza skills
Ingredients
- 1 cup brown rice flour (provides lightness and a subtle nutty flavor)
- 1/2 cup tapioca starch (adds chewiness and crisp edges)
- 1/4 cup almond flour (boosts buttery taste and moisture retention)
- 2 tsp xanthan gum (essential for dough elasticity in gluten-free baking)
- 1 tbsp sugar (feeds yeast for a perfect rise)
- 1 tsp salt (enhances all flavors)
- 1 packet (2 1/4 tsp) active dry yeast
- 3/4 cup warm water (about 110°F/43°C, to activate yeast)
- 2 tbsp olive oil (creates a tender crust and helps with browning)
instructions
- Activate the yeast: In a small bowl, whisk together warm water and sugar. Sprinkle the yeast over the surface and let it bloom for 5 to 7 minutes until foamy. this ensures active yeast for a strong rise.
- Mix dry ingredients: In a large bowl, combine brown rice flour, tapioca starch, almond flour, xanthan gum, and salt. whisk thoroughly to distribute all ingredients evenly.
- Combine wet and dry: Pour the yeast mixture and olive oil into the dry ingredients. Using a sturdy spoon or your hands, mix until a sticky dough forms. Don’t worry if it feels wetter than standard dough; gluten-free dough is naturally tackier.
- Knead lightly and rest: Lightly flour a clean surface with brown rice flour and knead your dough gently for about 2 minutes. Transfer to a lightly oiled bowl, cover with a damp cloth, and let rise in a warm spot for about 1 hour, or until it puffs up slightly.
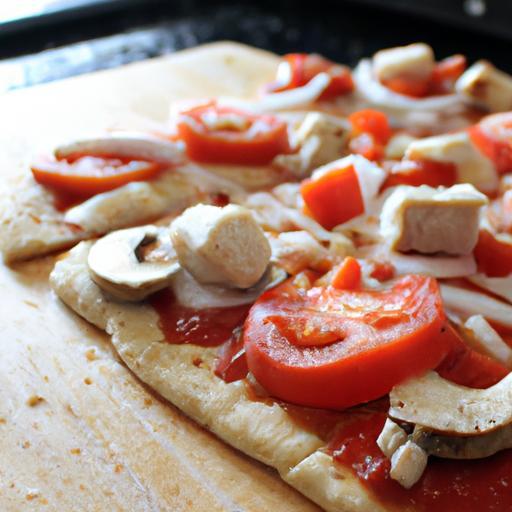
- Prepare to shape: Preheat your oven to 475°F (245°C). Line a baking sheet or pizza stone with parchment paper. Dust your surface again with brown rice flour, then gently press and stretch the dough into a 12-inch circle, creating a slightly thicker rim for the crust edge.
- Pre-bake for crispiness: Slide the crust onto the baking sheet or stone. Bake for 8-10 minutes until the edges begin to turn a delicate golden hue. This crucial step locks in structure and prevents sogginess.
- Add toppings mindfully: select toppings with balanced moisture to preserve crispiness. Light layers of sauce, cheese, and your favorite ingredients work best. avoid watery vegetables that could create steam and soften the crust.
- Final bake: Return the topped pizza to the oven and bake another 7-8 minutes, or until cheese melts and the crust’s underside is richly golden and crunchy.
Chef’s Notes: Tips for Success
- Flour blends: Experiment with sorghum or millet flours to tweak flavor profiles while maintaining crispiness.
- Xanthan gum importance: Don’t skip xanthan gum-it mimics gluten’s binding power, delivering that essential stretch and crisp bite.
- Hydration balance: Slight wetness in dough is normal; if it’s too sticky to handle, sprinkle a bit more brown rice flour in small increments.
- Make-ahead: Prepare dough a day in advance, cover tightly, and refrigerate. Let it warm and rise slightly before baking for even better flavor development.
- Prevent soggy bases: Toast mushrooms or other high-moisture toppings before layering to reduce sogginess.
Serving Suggestions
Serve your perfectly crisp gluten-free pizza crust on a wooden paddle or rustic stone plate to showcase the golden crust and inviting aromas. Garnish with fresh basil leaves, a light drizzle of high-quality extra-virgin olive oil, and freshly cracked black pepper for a burst of brightness. Pair with a side salad of arugula, lemon, and shaved Parmesan to balance textures and flavors beautifully.

| nutrient | Per Serving (1/3 pizza) |
|---|---|
| Calories | 320 |
| Protein | 7g |
| Carbohydrates | 45g |
| Fat | 9g |
For further reading on mastering gluten-free baking techniques, check out our recipe for Gluten-Free artisan Bread. To deepen your understanding of gluten-free flours and their properties, explore this excellent resource from Celiac Disease Foundation.
Q&A
Q&A: Gluten-Free Pizza Crust – Crispy, Delicious, and Easy Tips
Q1: Why is making a crispy gluten-free pizza crust such a challenge?
A: Great question! gluten provides elasticity and chewiness to traditional pizza dough, which helps trap air and create that perfect crust texture. Without gluten,achieving crispiness can feel like chasing a mythical creature. Gluten-free flours behave differently – they can be denser or more crumbly, making it tricky to get that golden, crunchy edge. But don’t worry, with the right ingredients and techniques, crispy gluten-free crusts are absolutely possible!
Q2: What gluten-free flour blends work best for pizza crust?
A: The magic usually lies in a blend! A combo of rice flour, tapioca starch, and potato starch often creates a balanced texture-rice flour adds structure, tapioca starch brings chewiness and stretch, and potato starch lends crispiness. Some bakers also toss in almond flour or chickpea flour for flavor and nutrition. Many brands offer pre-mixed gluten-free pizza flour blends designed for that perfect crust-great time-savers!
Q3: How can I make my gluten-free pizza crust crispy without it turning crumbly?
A: Balance is key! Hydration, fat, and binding agents like xanthan gum or psyllium husk help create a dough that holds together but also crisps nicely. Pre-baking (parbaking) the crust before adding toppings prevents sogginess. Using a pizza stone or steel in a hot oven helps draw out moisture and encourage that coveted crunch. don’t overload toppings or sauce-they can weigh down the crust!
Q4: Are there any special tools or techniques that help?
A: Absolutely! A pizza stone or steel is your best friend-it mimics a brick oven floor, providing intense, even heat for crispy results. Using parchment paper or a pizza peel makes transferring your dough easier. Some chefs brush the crust with olive oil before baking to encourage browning and crispness. And if you can crank your oven up to 475-500°F (245-260°C), you’ll get that restaurant-quality crust at home.
Q5: Can I make the dough ahead of time?
A: Yes! Gluten-free dough often benefits from resting-letting it sit for 15-30 minutes allows the flours and binders to hydrate fully, improving texture. You can also prepare the dough a day ahead and refrigerate it. Just bring it to room temperature before shaping and baking. Pre-baking the crust and freezing it for later is another savvy time-saver, perfect for rapid meals.
Q6: What toppings pair best with a gluten-free crust?
A: The sky’s the limit here, but lighter toppings help keep the crust crispy. Think: fresh veggies, thinly sliced meats, and moderate cheese. avoid watery toppings like fresh tomatoes without draining them well, as excess moisture can make any crust soggy. experiment with herb oils or a sprinkle of sea salt post-bake for an extra flavor punch!
Q7: Any bonus tips for gluten-free pizza crust success?
A: Don’t be afraid to experiment! Every gluten-free flour blend behaves a bit differently, so tweak water amounts and baking times. Keep your oven hot, use gluten-free baking parchment to avoid sticking, and resist the temptation to cut into the pizza right out of the oven-let it cool slightly to firm up. Above all, enjoy the process; gluten-free pizza can be just as delicious and crispy as the traditional kind with a little practice!
Ready to conquer gluten-free pizza crust? With these creative tips and a pinch of patience, your next pie will be crispy, delightful, and utterly satisfying!
Key Takeaways
Crafting the perfect gluten-free pizza crust doesn’t have to be a culinary mystery. With the right blend of ingredients, a few easy tweaks, and a sprinkle of patience, you can achieve that coveted crispy, golden texture without compromising on flavor. Whether you’re a seasoned gluten-free baker or just starting your journey, these tips open the door to delicious homemade pizzas that everyone will love. So grab your favorite toppings, preheat your oven, and get ready to enjoy pizza night the gluten-free way-crispy, delightful, and utterly satisfying. Happy baking!